
Thinking about launching your website, but don’t know where to start? You’re not alone. With numerous tools and platforms available today, building a website on your own is no longer reserved for tech experts or web developers. DIY website design has become one of the most accessible skills for entrepreneurs, creators, freelancers, and small business owners.
Whether you’re starting a blog, promoting your portfolio, or selling products online, having a website puts you in control of your digital presence. The good news? You don’t need to know how to code. With the right tools and guidance, you can design a professional website from scratch — even as a beginner.
In this beginner-friendly guide, we’ll walk you through the 7 essential steps to design your own website. From choosing a platform to writing content and launching live, you’ll learn how to turn your idea into a functional and good-looking website that gets results.
Let’s get started.
Why Design Your Own Website?
If you’re still wondering whether DIY web design is worth your time, here are some compelling reasons to take the plunge:
Save Money
- Hiring a professional web designer can cost thousands.
- Building it yourself means you can allocate that budget elsewhere, such as for marketing or content.
Total Creative Control
- You decide the layout, colours, fonts, and features.
- No more back-and-forth with developers—edit whenever you want.
Learn a Valuable Skill
- Understanding how websites work is a powerful skill in today’s digital world.
- You’ll gain insights into user behaviour, structure, SEO, and more.
Move Fast
- DIY means you set your own timeline.
- Launch quickly, test ideas, and make changes instantly.
Build Something That’s Truly Yours
- From the homepage to the About page, every piece reflects your brand, personality, and goals.
- It’s not just a site—it’s your digital home.
Step 1: Define Your Website’s Purpose
Before you touch a template or pick a color palette, you need to answer one foundational question:
What do you want your website to do?
Every great website starts with a clear goal. Are you:
- Starting a blog to share ideas or build authority?
- Showcasing your portfolio as a designer, photographer, or creative?
- Creating a small business site to promote services?
- Launching an eCommerce store to sell products online?
- Building a personal brand or resume site?
Once you know the type of website, narrow it down further by defining your target audience. Ask yourself:
- Who is visiting your site?
- What are they looking for?
- How can you guide them to take action?
Then, set 1–2 clear objectives. For example:
- “I want visitors to contact me for freelance projects.”
- “I want users to subscribe to my newsletter.”
- “I want to sell digital art prints online.”
Your website’s layout, content, and design will all depend on these answers. Without this step, it’s easy to get lost in visual decisions that don’t serve a goal.
Pro tip: Write your website’s goal in one sentence and keep it visible throughout the design process. It’ll keep you focused and intentional.
Step 2: Choose the Right Website Builder
Once you’ve defined your website’s purpose, the next step is picking a tool to bring it to life — a website builder.
The good news? You don’t need to code. Today’s builders are designed for beginners and offer drag-and-drop interfaces, pre-built templates, and customisation tools.
Popular Website Builders for Beginners:
- Wix – Great for creatives and small businesses. Very easy to use with lots of design freedom.
- Squarespace – Sleek and elegant templates, ideal for portfolios and personal brands.
- WordPress.com – Flexible and scalable. Great for blogs and content-driven sites.
- Shopify – The go-to choice for eCommerce stores.
- Webflow – Offers design control for beginners who want to learn advanced features over time.
What to Look For:
- Ease of Use – Is it beginner-friendly?
- Design Options – Are there templates that suit your niche?
- Integrations – Can you connect tools like email, chat, or Google Analytics?
- Pricing – Is there a free plan or low-cost starter option?
Pro tip: If you just want to get online fast, go with Wix or Squarespace. If you’re planning to scale your website into a content hub or online store, consider WordPress or Shopify.
Take time to explore a few builders before you commit — most offer free trials or demos.
Step 3: Choose a Template and Layout That Fits
Your website’s first impression comes from its design — and that starts with the template or theme you choose.
Website builders offer 100s of professionally designed templates for different industries, goals, and styles. The best part? You can customise them without touching a single line of code.
What Makes a Good Template?
- Matches Your Purpose
If you’re building a portfolio, choose something minimalist. For an eCommerce store, go with a product-focused layout. - Mobile-Responsive
Over half of web traffic is mobile. Your template must adapt to phones and tablets seamlessly. - Clean & Easy Navigation
Users should know where to click, what to do, and how to reach you in seconds.
Key Sections to Include:
- Homepage – Eye-catching and clear value proposition
- About Page – Who you are, what you do
- Services/Products – What you offer
- Contact Page – Forms, email, phone, location
- Blog (Optional) – Useful for SEO and brand voice
Pro Tip: Don’t overcomplicate. Choose a simple, well-structured template first. You can always tweak colors, fonts, and images later.
Step 4: Customise and Add Content
Now that you’ve chosen your template, it’s time to make it yours — visually and strategically.
Key Areas to Customise:
- Branding: Add your logo, choose brand colours, and stick to 1–2 fonts. Consistency is key to looking professional.
- Navigation Menus: Simplify the top menu. Prioritise core pages like Home, About, Services, and Contact.
- Visual Elements: Replace stock images with your photos, product shots, or graphics. Use high-quality visuals to build trust.
- Content Sections: Add clear, purposeful copy for each section — value proposition, benefits, testimonials, etc.
Writing Tips:
- Homepage: Hook visitors with a headline that says what you do and who you help.
- About Page: Share your story. Keep it concise but relatable.
- Service/Product Pages: Focus on benefits, not just features. Add pricing or CTAs where needed.
- Contact Page: Use forms, maps, social links, or chatbots to make it easy for users to reach you.
Pro Tip: Use free tools like Grammarly or Hemingway Editor to keep your writing clear and error-free.
Step 5: Set Up Domain & Hosting
To make your website live on the internet, you need two key things: a domain name and hosting.
1. Get Your Domain Name
Your domain is your website’s address (e.g., yourname.com).
- Choose a name that’s simple, brandable, and relevant to your website’s purpose.
- Use platforms like GoDaddy, Namecheap, or Google Domains to register it.
- Stick to .com if possible, or go with .co, .in, or niche extensions like .studio or .shop.
Tip: Make sure your domain is easy to spell and remember.
2. Choose a Hosting Plan
Hosting is the service that stores your website files and makes them accessible online.
- If you’re using Wix, Shopify, or Squarespace, hosting is included.
- For WordPress, you’ll need separate hosting from providers like Bluehost, SiteGround, or Hostinger.
- Look for features like uptime guarantee, speed, support, and backups.
3. Connect Domain to Hosting
Once both are set up:
- If you used an all-in-one platform (like Wix), just publish.
- If you’re using WordPress, point your domain to your hosting provider’s nameservers — they’ll guide you step-by-step.
Once connected, your site is officially live!
Step 6: Test, Preview & Optimise Before Launch
Before you hit that “Publish” button, take time to fine-tune your website. This step helps ensure your site works smoothly, looks great across devices, and delivers a good user experience.
1. Preview on Multiple Devices
- Check how your website appears on desktop, tablet, and mobile.
- Make sure all content (text, images, buttons) resizes and aligns properly.
- Most website builders and WordPress themes offer device previews — use them!
2. Test All Functionalities
- Click every button and link — they should lead to the right pages.
- If you added a contact form, test it by sending a message.
- For eCommerce sites, do a mock checkout to ensure payment flow works.
- Ensure pop-ups, sliders, and other interactive elements behave as expected.
3. Check Page Speed
- Use tools like Google PageSpeed Insights or GTmetrix to analyse load time.
- Optimise image sizes, reduce plugins, and enable caching if needed.
4. SEO Basics
- Set proper page titles and meta descriptions.
- Add alt text to images.
- Create a clear URL structure and check your site’s navigation flow.
5. Proofread!
- Fix typos, check grammar, and ensure your content reads well and reflects your brand voice.
Once everything looks and works great, you’re ready to launch in the next step!
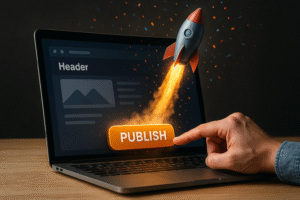
Step 7: Launch & Promote Your Website
Now that your site is ready, it’s time to go live and let the world see it! But launching isn’t just hitting “Publish” — it’s about making sure people find it too.
1. Publish Your Site
- Double-check your domain is connected and working.
- Click “Publish” on your builder or CMS platform.
- Ensure your SSL certificate (HTTPS) is active for secure browsing.
2. Submit to Google
- Create a free Google Search Console account.
- Submit your sitemap so Google can start indexing your pages.
- It helps your site show up in search results faster.
3. Share on Social Media
- Announce your launch across platforms like Instagram, LinkedIn, Twitter, and Facebook.
- If it’s a portfolio, blog, or business, highlight what your site offers and invite feedback or visits.
4. Tell Your Network
- Send an email to friends, colleagues, or past clients.
- Ask them to explore and even share your site if relevant.
5. Track and Improve
- Set up Google Analytics to monitor traffic.
- Watch user behaviour and identify which pages are working well (or not).
- Use this insight to keep refining your content, layout, or calls-to-action.
Remember — a great website keeps evolving. Keep it updated, fresh, and user-focused over time.
FAQs
Q1. Can I design a website without coding?
Yes! With website builders like Wix, Squarespace, or WordPress (with Elementor), you can create professional websites without any coding knowledge.
Q2. How much does it cost to design a website by myself?
It depends on your platform. Basic websites can cost as little as ₹2,000–₹5,000/year for a domain and hosting. Paid themes or plugins may add to the cost.
Q3. Which platform is best for beginners?
Wix and Squarespace are easiest for beginners. WordPress offers more flexibility but has a steeper learning curve.
Q4. Do I need to buy a domain and hosting separately?
Yes, unless you use platforms like Wix (all-in-one). With WordPress, you’ll need to buy hosting (e.g., Hostinger, Bluehost) and a domain separately.
Q5. How long does it take to design a website?
A simple 4–5 page website can take a few hours to a few days, depending on your comfort level and platform.
Q6. Can I make my website mobile-friendly?
Most builders offer mobile-responsive templates, but always preview and test on multiple devices before launching.
Q7. What should I put on my homepage?
Your homepage should clearly show who you are, what you offer, and how visitors can take action (contact, shop, learn more, etc.).